
Ah, taking screenshot on Dell laptop, very important skill, yes? Sometimes you see funny cat picture, or important document, must capture quickly! No problem, I show you easy way, like chopstick easy!
Taking Screenshot Like Ninja: Option One
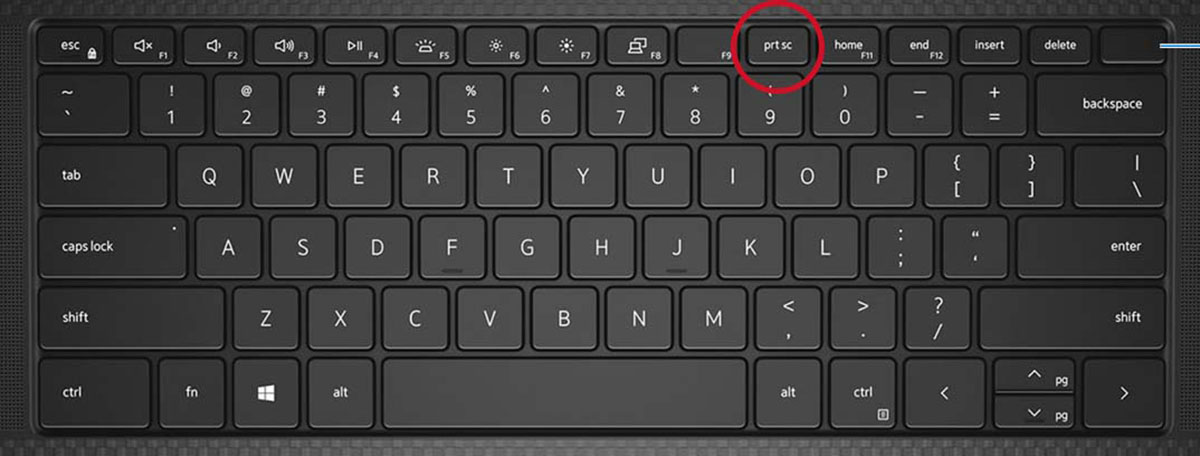
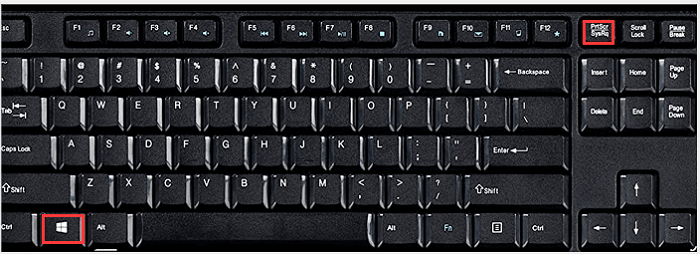
First method, very simple! You find the ‘Print Screen’ button on your keyboard. Usually, it’s labeled ‘PrtScn’ or something similar. It might be up top near the F1, F2 buttons. Okay, you find it? Good! Now, you press this button. That’s it! You take screenshot! But wait, where it go? It’s not magic! The screenshot is now saved to your clipboard. Think of it like invisible sticky note.
To see the screenshot, you need to paste it into a program. Open Microsoft Paint (very easy program comes with Windows), or Word, or even email. Then, press ‘Ctrl+V’ to paste. Boom! Your screenshot appear. Now you can save it as JPG or PNG. PNG is good for pictures with writing, JPG is good for photos.
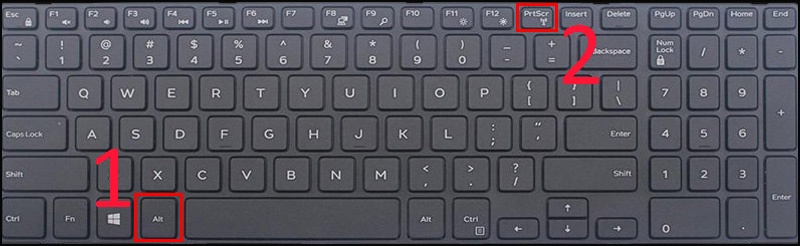
Sometimes, you only want to capture one window, not whole screen. No problem! Before you press ‘Print Screen,’ click the window you want to capture. Make sure the window is active. Then, hold down the ‘Alt’ key while you press ‘Print Screen.’ This only captures the active window, very neat and tidy!
This method is very good for quick screenshots, but it doesn’t have many options. If you want more control, try the second method!
Taking Screenshot Like Samurai: Option Two
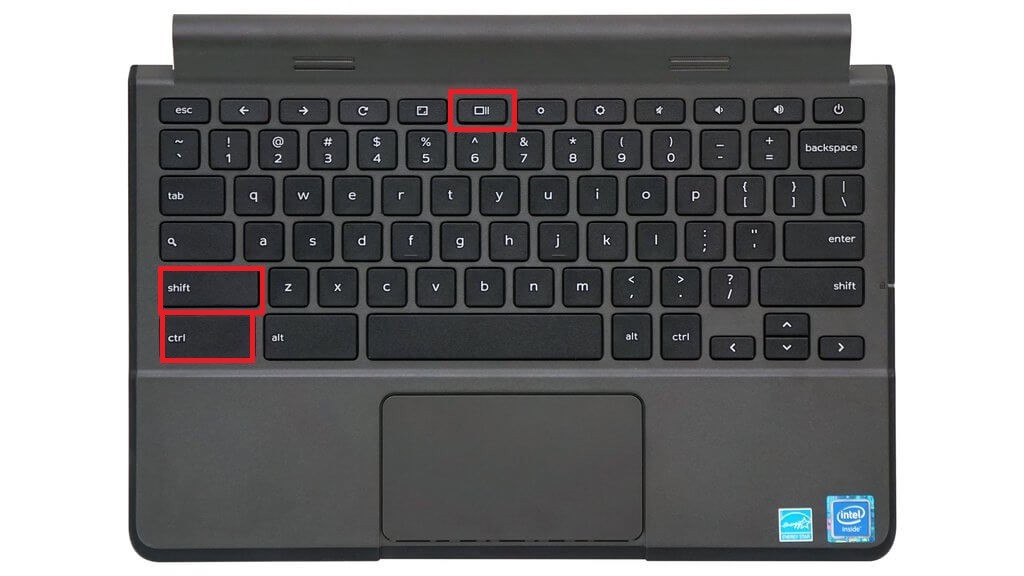
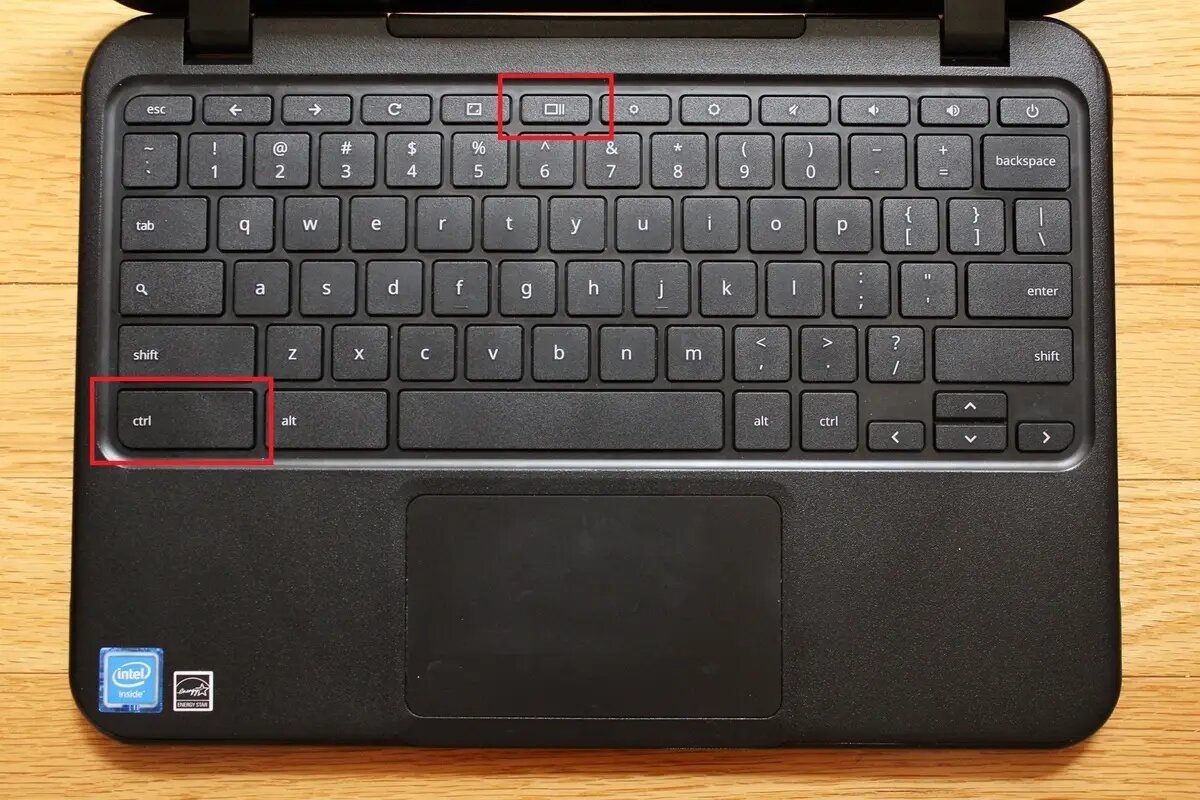
Second method, a little more powerful, little more finesse! This involves the ‘Windows Key’ and the ‘Shift’ key, and the ‘S’ key. Find these keys on your keyboard. Ready? Press them all at the same time! Hold ‘Windows’ and ‘Shift,’ then tap ‘S.’
The screen will dim slightly, and you’ll see a little crosshair cursor appear. This is like your screenshot samurai sword! Now you can drag the crosshair to select the area you want to capture. Click and hold the mouse button, and drag the box around the area. When you release the mouse button, the screenshot is taken!
Just like the first method, the screenshot is saved to your clipboard. You need to paste it into a program to see it and save it. Open Paint, Word, or email, and press ‘Ctrl+V’ to paste. Very efficient, very precise!
This method is good for capturing specific parts of the screen. You don’t have to capture the whole screen, only the important bits. You can also draw a freeform shape around the area you want to capture, very useful for capturing oddly shaped things. Remember to practice, practice, practice! Then taking screenshot will be like breathing!
Both methods are good. Depends on what you need. First method fast, second method precise. Now you know both! Go forth and capture all the screenshots!
If you are looking for How To Take A Screenshot On Dell Laptop You – My Bios you’ve came to the right web. We have 10 Images about How To Take A Screenshot On Dell Laptop You – My Bios like How To Take Screenshot In Dell Laptop Windows 10 | Robots.net, How To Take Screenshot In Dell Laptop Windows 10 | Robots.net and also Top 3 Ways To Take Screenshot On A Dell Laptop Window – vrogue.co. Here it is:
How To Take A Screenshot On Dell Laptop You – My Bios
mybios.me
How To Take Screenshot In Dell Laptop Windows 10 | Robots.net
robots.net
How To Take A Screenshot On Dell Laptop You – Bios Pics
mybios.me
catturare schermata lenovo informarea finestra pc keyboard
Top 3 Ways To Take Screenshot On A Dell Laptop Window – Vrogue.co
www.vrogue.co
How To Take A Screenshot On Dell Laptop You – My Bios
mybios.me
screenshot bios
Top 3 Ways To Take Screenshot On A Dell Laptop Window – Vrogue.co
www.vrogue.co
How To Take A Screenshot On Dell Laptop You – My Bios
mybios.me
How To Take A Screenshot On Dell Laptop You – My Bios
mybios.me
How To Take Screenshot In Dell Laptop Windows 10 | Robots.net
robots.net
How To Take A Screenshot On Dell Laptop You – Bios Pics
:max_bytes(150000):strip_icc()/A2-TakeaScreenshotonaDellLaptop-annotated-ec47a86d15a142dc8eb5a740ef6d3284.jpg)
mybios.me
keyboard logitech pressing keyboards lifewire
Screenshot bios. How to take a screenshot on dell laptop you. Keyboard logitech pressing keyboards lifewire


:max_bytes(150000):strip_icc()/008_how-to-factory-reset-a-lenovo-laptop-5115817-a67348722ce94f9783881ea29e596310.jpg "how to factory reset my evoo laptop How to factory reset a lenovo laptop")